


Assemblage of the pull-out drawer.
Followed by the general assemblage. That Sunday night I was able to put the wheels on it so we could get it inside.

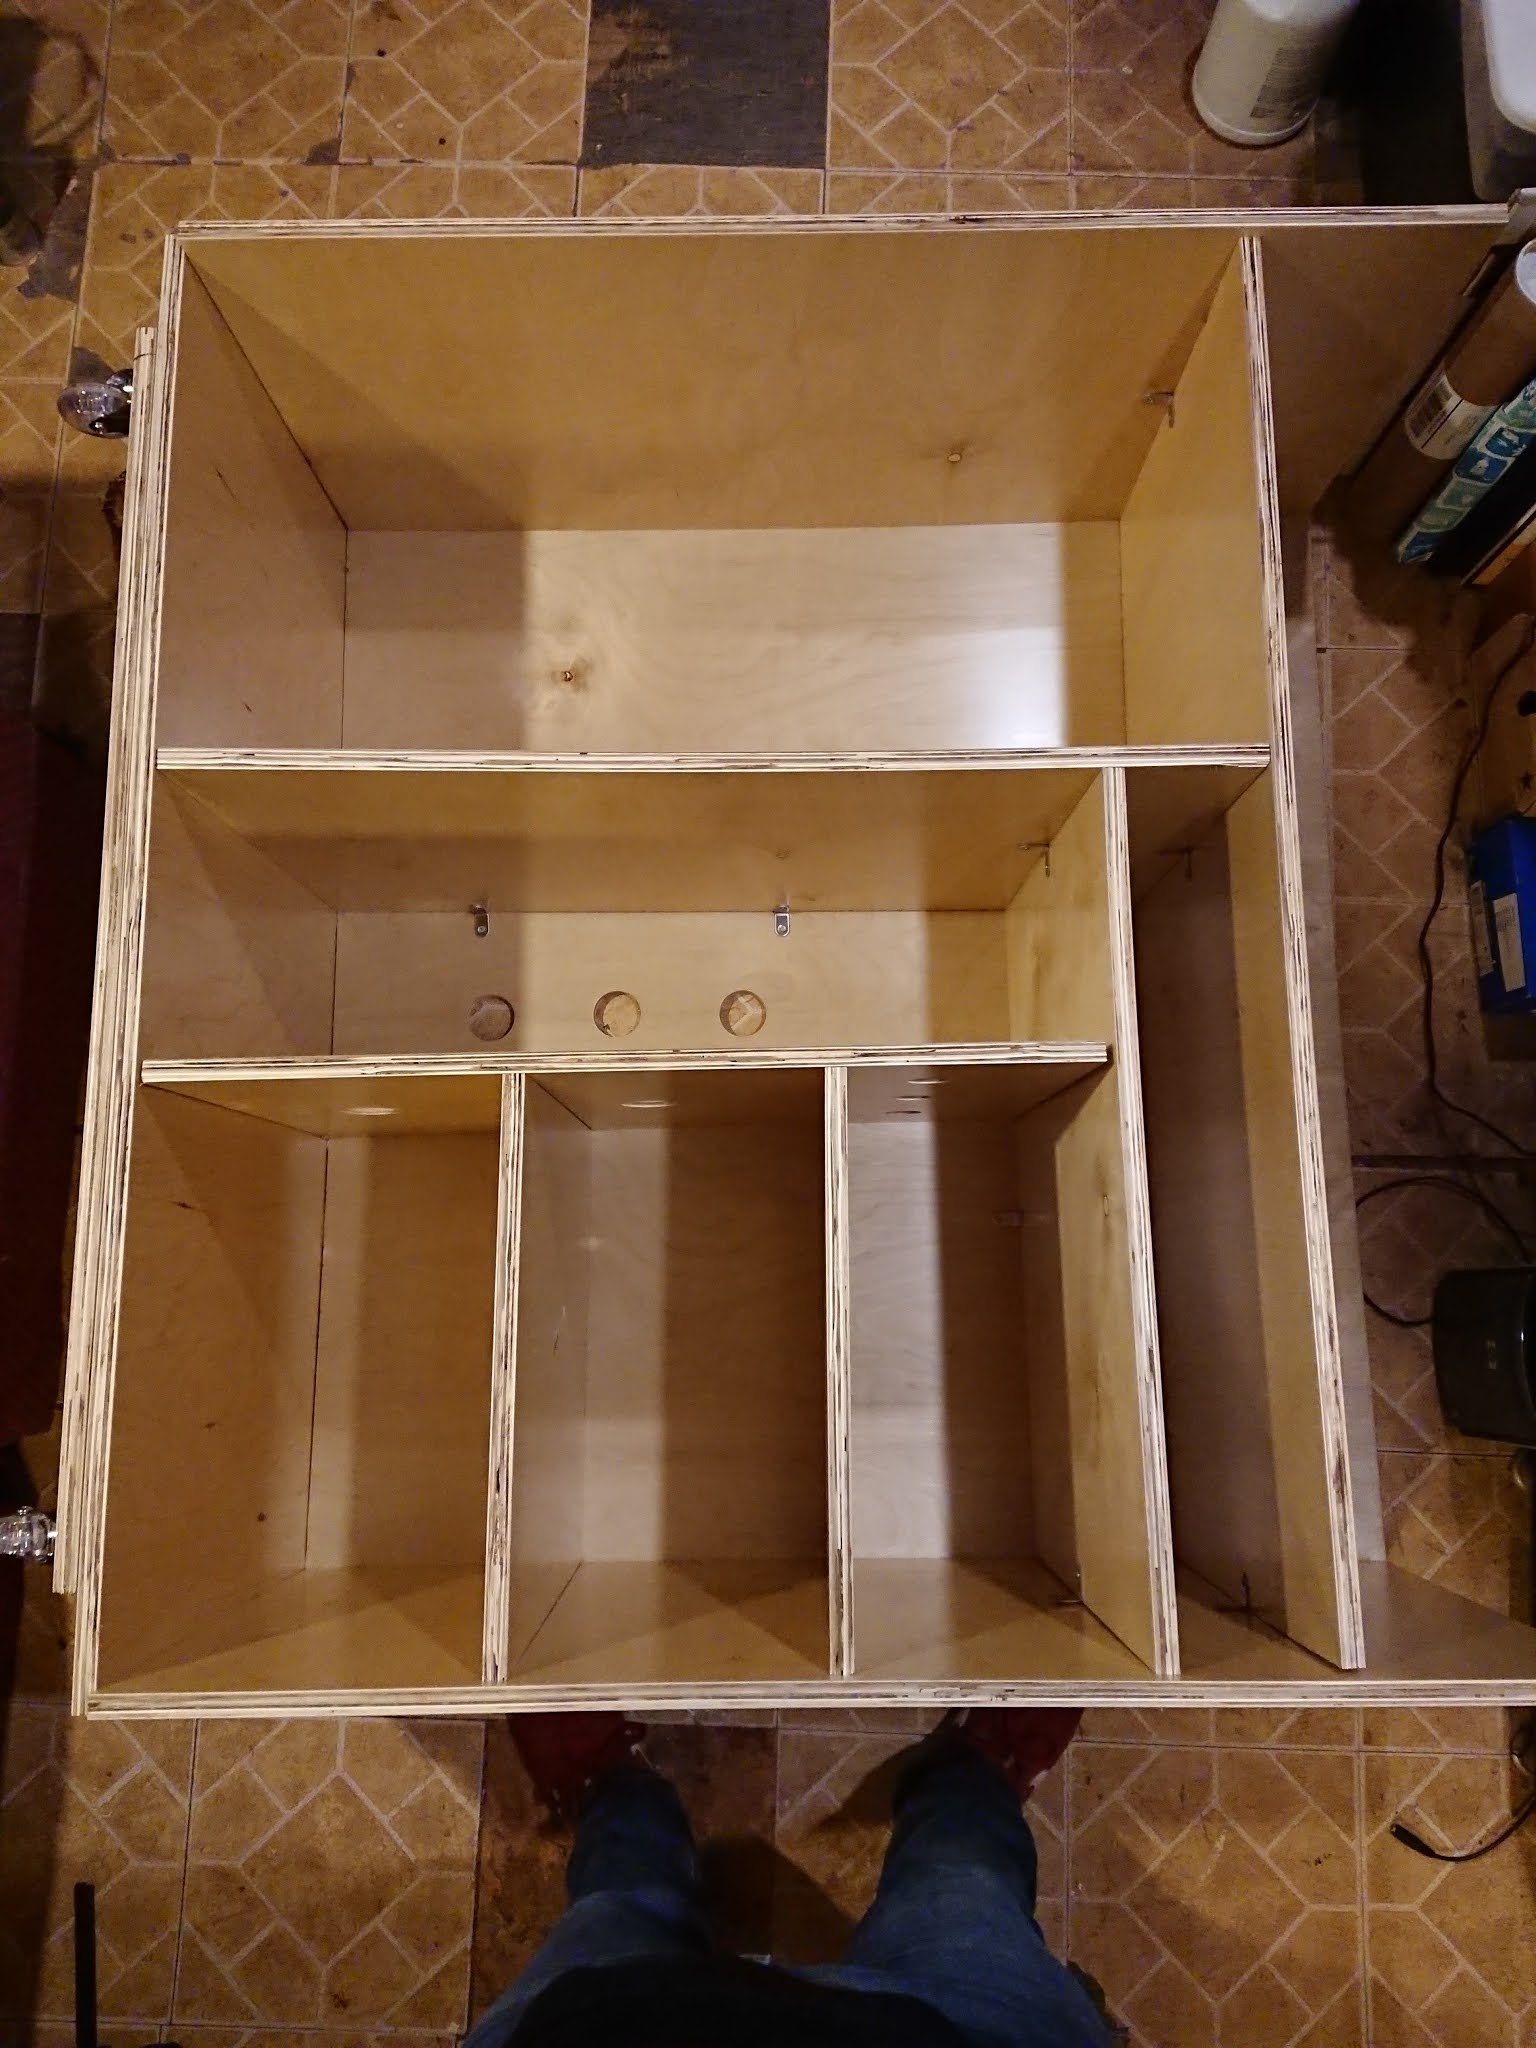
Measuring the shelves on the right side. These weren't a strict size like the left side so I did multiple measurements and drilling so the shelves can be adjusted as needed with removable pegs.

The left side shelves, however, have a very specific purpose, holding flat comic pages, and are sized accordingly. Each shelve had to have certain dimensions inside and are permanently bolted it.
Next came the installation of the pull-out shelf, which actually turned out to be the easiest thing to do in the whole project. A spare piece of wood was used to set each slide at a uniform height on each side, then drilled. That same piece was then laid flat on the center surface as I sat the drawer in on top, giving the drawer the proper clearance underneath. After that I just lined up the slides to the drawer drilling each one as I gradually slid the drawer out. Viola!

Finally came the crowning top. At first I wasn't sure if I wanted to go with tempered glass or clear plexiglass. After shopping around online I decided to go with the plexi on account of it'll be easier to install and the chances are much lower that it will shatter on me, for any reason. And to lessen any possibility of warping or sagging I matched the thickness of the plastic with the thickness of the wood.
After a 10 minute search I found a local plastic manufacturer that could produce the dimensions I requested and that also turned out to be the most affordable quote. The turnaround was 5 days.


A bracket in each corner followed by a quick drill pass in each of those corners created a way to fasten this thing down via bolts, screws and washers. Inspired by many clear and frosted-topped desks and how they focused light coming up from the bottom I purchased an LED strip kit to wire up along the edge underneath to create an ambiance and give it a modern feel. The strip can produce all sorts of colors and is wired up via USB, which powers up with one of the towers down there. I also like how if I ever need a light-box all I have to do is place a tiny light face up and trace away.
Ultimately, the pull-out shelf is to house a turntable and large format scanner. I already had a turntable stashed away in the stacks of junk this shelf helped replace. After ordering a new stylus and a pre-amp I'm able to play my favorite records right here in the studio, as well as record those records either for archiving or sampling purposes. The scanner, of course, is for scanning flat work to use digitally and for archiving. So not only does this furniture piece provide me with organization of existing work, but it makes it easy for me to keep organized, to stay on top of archiving work and filing it away.

This shelf consolidated so much space that was being taken up by cumbersome, unsightly boxes and various other dollar store bins and shelves it has literally changed the energy of the studio. As I was sorting, organizing and filling this thing up I felt myself become lighter, my mind less cluttered. Indeed, I feel like since I've been able to put stuff away in a permanent place it's become a finality, a closure of sorts for work spanning the last 12 years which is a very big deal, folks. There are few things worse for a creative mind than stifling your workspace with old work that just continues to pile up. You don't feel like you're progressing being constantly reminded of things you drew half a decade ago. You have to get rid of it or find a way to store it out of sight, otherwise you'll feel stuck!
And there you have it, how I created a custom piece of studio furniture and how it changed the work flow in the studio for the better. Now for a quick run down of what this this cost to build:
Plywood - ¾" Birch 4' x 8': $57 a sheet x 3 sheets = $171
Custom Cut Clear Plexiglass ¾" 20" x 48" = $200
LED Light Strip = $10
USB Switch for the LED lights = $6.89
Clear Caster Wheels = $25
Heavy Duty Drawer Slides = $20
Various hardware including wood screws, L brackets, pegs & bolts = $48
Total, not including tax = $480.89
Not bad! Having this custom made would have easily cost twice that (at least).
Other notable expenses that make this desk/shelf work:
9" Metal L bookends (these hold all that flat work vertical) = $11.90
Special Switch that Hooks 2 Computers to 1 Display = $31.96
If you think you wanna build this for yourself, holla at me and I'll send you the PDF plans. Shout out to KCool for helping me out during the cutting and assembling process.
I wonder what I'm gonna build next...
No comments:
Post a Comment
Note: Only a member of this blog may post a comment.